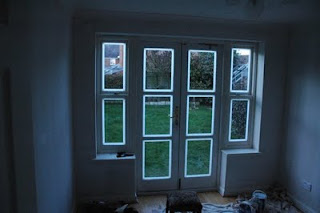
 Last year, I had a major crisis when the hot water tank burst. The water poured through the ceiling and left stain marks on the ceiling and wallpaper. So during this holiday, I decided to make a start on redecorating our dining room. the picture above, is what the wallpaper looked like before I started the decorating.
 First, I started to remove the radiator. Having done this before, I am becoming confident of doing this without any major mishaps. I just needed a couple of sauspans to drain the water from inside the radiator itself. This particular radiator made it even easier for me as there were valves at both ends to shut down the water supply, so I didn't have to go into the loft and shut down the water supply from there. Once I had losened the nuts at the base, all I had to do was open the bleed valve and let the water pour into the sauspan. When the saucepan was full, I tightened up the bleed valve to stop the water flow, emptied the saucepan, and then repeated the process until all the water was drained.
 Soon, the radiator was off the wall. As you can see, there were loads of cobwebs behind the radiator. You can also see that when I last did the wallpapering, I hadn't removed the radiator. I hadn't even bothered to remove the original wallpaper either! I put special end caps onto the pipes to stop any potential leaks while I was doing the decorating. I also removed the support brackets for the radiator. One problem I did have though. The plastic grommets that held the radiator in place on the brackets had become brittle and disintegrated when I took the radiator off the brackets. Luckily, I still had some grommets left from when I had taken the radiator off in the hallway. Now I have only one grommet left, I think I will need to get some more in stock for my next decorating project!
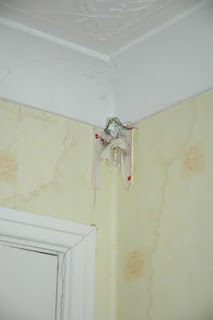
Next, it was the infrared detector to be removed. This involved me shutting down the alarm system (which took 20 minutes of the external siren wailing before it shut up), then carefully removing the sensor, and making a note of the order of the wiring connections as I removed it. As you can see in this picture, you can clearly see the water damage, and also the last time I decorated this room I didn't remove the detector (I didn't have enough confidence in myself at the time to attempt such a task).
 I then put masking tape arround the windows, floor edges, and light fittings. Then I commenced wallpaper stripping, with lots of help from my wife and daughter. Once the wall paper was off, I commenced painting the ceiling, window frames and the skirting boards.
Finally, all the preparation was completed< and with help from my wife and daughter, we started putting on the new wallpaper.
 It took us two days to complete the wallpapering. We could have done it more quickly, but we only did a few hours each day, as we had other things we wanted to do with our time. As you can see from this picture, the room certainly looks different. Personally, I don't like the look of the wallpaper, but I let the girls choose what they wanted, and they seem very happy with the result!


